How to batch your Instagram content, 3-6 months in advance

Now I know, I know this may go against everything that Instagram is about, as in “Insta”, meaning instant but we all know that as a business owner, trying to post something every day or every other day whilst we have a million other things to do - is nigh on impossible.
Hence why in this post, I’m going to talk you through how I mass batch my instagram, up to 6 months in advance - from how I source my imagery to writing the content to adding it into a scheduling tool - and soooo many good hacks inbetween.
Before we begin I want to preface this by saying that…
I know I’m in the rarity, in that, when most people who do batch their content, they’ll create up to 2-3 months in advance but I’ma tell you why I do it so far ahead…
I HATE the stress and anxiety I get when trying to think up new content on the reg, get the images all sorted, make sure it looks good, write the copy, schedule it or direct post it into the app.
That’s why I find doing it so far into the future helps me feel so much calmer and get on with other things in my biz like client work.
My business isn’t something that is constantly changing like news stories, it lends itself well to being done way off in the future.

Images laid out in Canva

Uploaded to Instagram
My controversial thoughts about how & why I use Instagram;
To show I’m still in Business
Social proof is pretty important and one of the first places new customers go when checking your business out for legitimacy. I find that lots of ppl who show their insta account on their website, actually don’t post regularly. This makes your business look inactive, new customers may ask, are they even still around? A post here and there from a few years ago just to have an insta account on your website is not relevant - remove insta from your website if you don’t post.
Design Portfolio
I love that with Instagram, my new followers can see my design style super easily. I always make sure that my account looks visually appealing.
For example if you were a coach, if you had lots of quote imagery with your thoughts written out big, then at a glance someone would be able to tell what you’re about super easily.
Get to know me
People are able to get to know me from reading my captions and the more personal posts I create, especially my stories which are always way more personal than my grid.
Now let’s get back to the juicy bit of this post 👉
After years of trial and error of perfecting how I do this, I’m super excited to finally share my mass batch method with you.
In today’s post I’ll be covering…
1. Strategy - Topics, Dates & Plotting
2. Collating and creating your imagery in Canva
3. Grid layout in Canva
4. Writing Captions in a Google Doc
5. Scheduling Posts
*Bonus - Stories

L E T ‘ S B E G I N…
1. Strategy - Topics, Dates & Plotting
Topics
Firstly, let’s start with what you want your Instagram to be about.
I want you to grab a piece of paper and note down 3-5 things you mainly want to talk about on your Insta.
The 5 categories I talk about are;
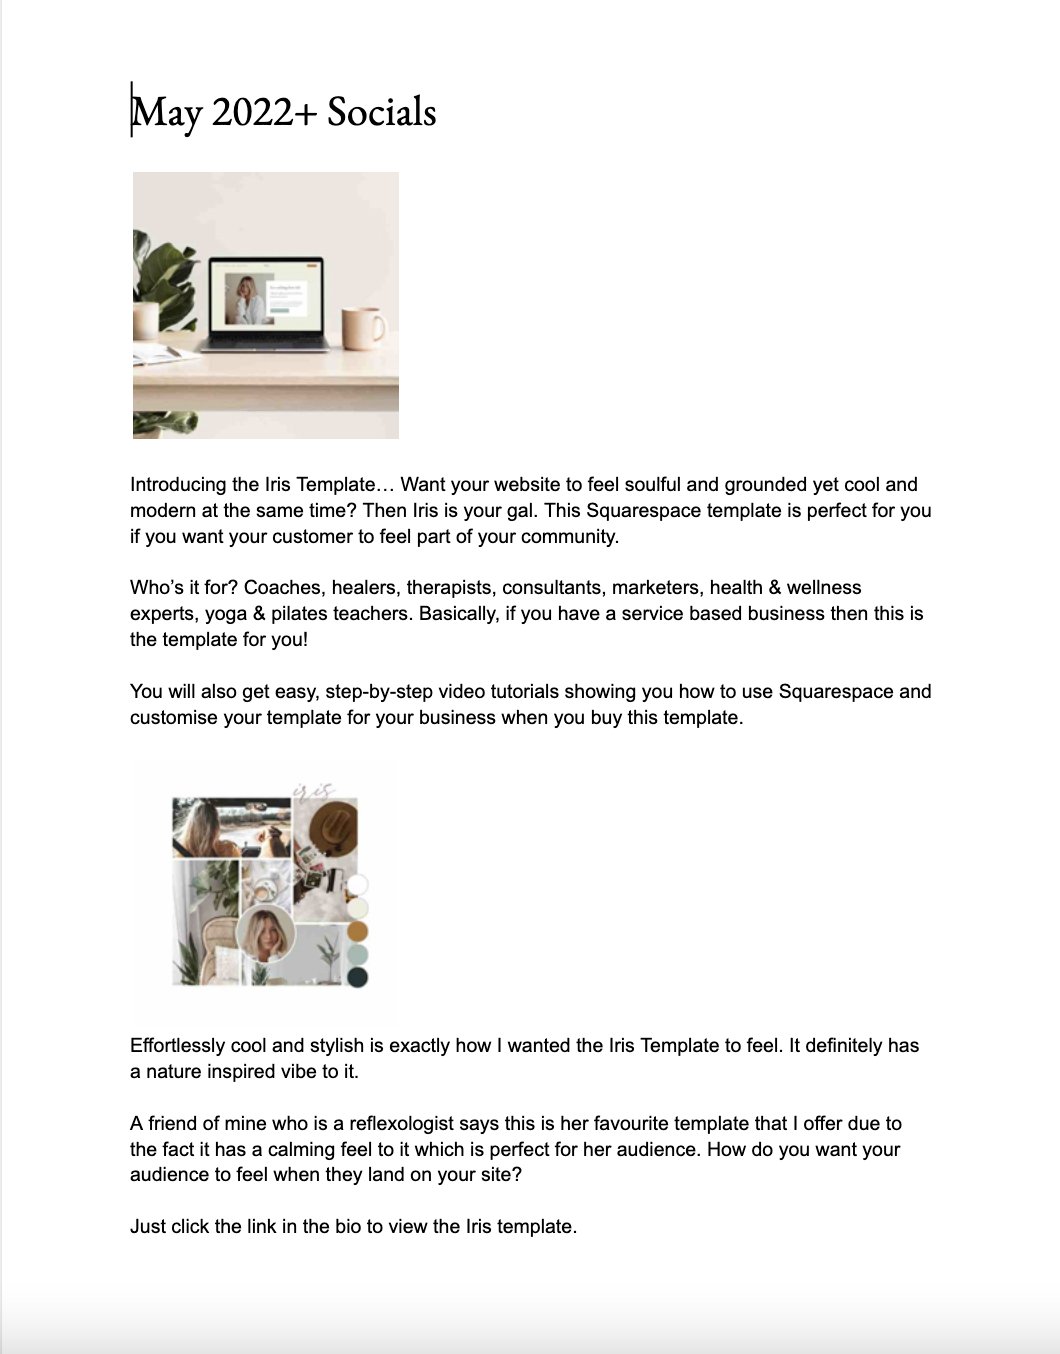
Squarespace
Website Design
Branding Tips
Online Business
Inspiration & BTS of my biz
As a business coach yours could be; simple tech strategy hacks, money mindset, motivational words, top tips when starting a new business
As a pilates or yoga teacher yours could be; menopause (your niche), movement tips, general wellness inspirational quotes, a history of yoga / pilates
As a wedding photographer yours could be; poses, location ideas for best diff wedding occasions, outfit & prop ideas, bts look at your biz
You may also like to repeat something every month like, an end of month review post. One of my clients does a Monday Mantra post - not every week but it’s something she likes to add occasionally.
These Core topics will help you in the imagery and copy stage of the batching process.
On your piece of paper, decide…
Batch length
How long into the future do you want to batch for; a month? 3 months? 6 months? etc.
How often
Will you post twice a week, 3 times a week, every other day?
Calculate
If you’re going to post 3 times a week and you want to do 3 months (around 13 weeks) worth of batching, you’ll need to create around 40 posts
Dates
Perfect, we now know what kind of thing you’ll be posting about, how often and for how long you’ll be posting - now we need to know what will be happening over this period.
During the next 3 months what are you doing in your business?
(and remember I do it over 5-6 months so I need to really think about long term plans here)
Have you got a new product launch planned?
Will you be promoting your online course during this time period?
Do you want to focus one month on client work?
Are you creating a new freebie you want to promote?
Don’t worry if at some point you decide to promote something and think gahhh I’ve scheduled something else - all of this can be moved and played around with at a later date.
You can even just add tentative space in your batching for you to create the content closer to the time of your launch week, but you know you have it preliminary planned in - it just needs creating.
Also think about dates like - is Black Friday going to be happening in this 3 month period? back to school (if you’re working with parents), new moons, full moons, Spring Equinox (for my more spiritual folks) etc
You’ll really want to factor in specific big dates like Christmas as it’ll look odd if you don’t touch on it all. I know when Xmas and New Years are in my big batch periods, I like to talk about my end of biz year rituals and journaling and how I pick a word for the year in Jan, so I’ll do a post about that. Obvs at the time of batching I won’t know it, so I’ll make a note to add it closer to the time.
Plotting
Ok so you’ve got your strategy all sorted with what you’re going to be writing about, how long/often and now we have the dates let’s plot them out in my rough and ready grid map.
Let’s plot…
Have your list of all the dates over your batch period ready, eg. Spring Equinox, word of the year, valentines day (if you want to post then), online course launch etc
For things like launches, make extra points of how many days a week you want to post before your launch to get ppl excited and how often during the launch week. You may want to post several times a day before the cart closes.
Section off a piece of paper into the amount of posts you’ll be creating this batch for (see my example image below).
Now write in the top left corner of each square, the grid number, so this is in numerical order.
Look at a calendar and select the days you’d like your post to go out - write them at the bottom of the square and circle the number (this helps to not get mixed up with the grid number)
Whilst doing the above calendar day noting, be sure to add in your special event dates and launch period extra dates.


Hurrahhhh!!! You’ve now completed this strategy section and have all you need, to go to the next stage - gathering your images for your mass batch.
Also do note, you’ll get wayyyy quicker at this, the more times you do it!
Before we get to the next stage in this process, I want to say that I’ve done the next steps a few times now and there is a reason I do the imagery step first.
I’ve found it to be a lot easier this way. Some people may want to write out the copy first and that’s ok, but it’s not the way I’ve found easiest when creating content on scale.
If you are looking to be more intentional on a day to day or week to week basis - I get it! But this mass batch method may not be the way forward for you.

2. Collating and creating your imagery in Canva
As the title suggests I like to do the visual imagery side of this process all in Canva.
I like to create folders within Canva where I add lots of different types of imagery which help in the process, if you don’t pay for the paid version of Canva you can create these folders on your computer and upload them individually, but for now let’s go with my Canva folder process (you can always get a free trial to try this).
1. Create your image folders
In the left hand column, click Projects > (top right) + Add new > Folder > name folder…
Your folder will then appear below, click on the star besides the folder name - this makes it easier to appear when you start designing.
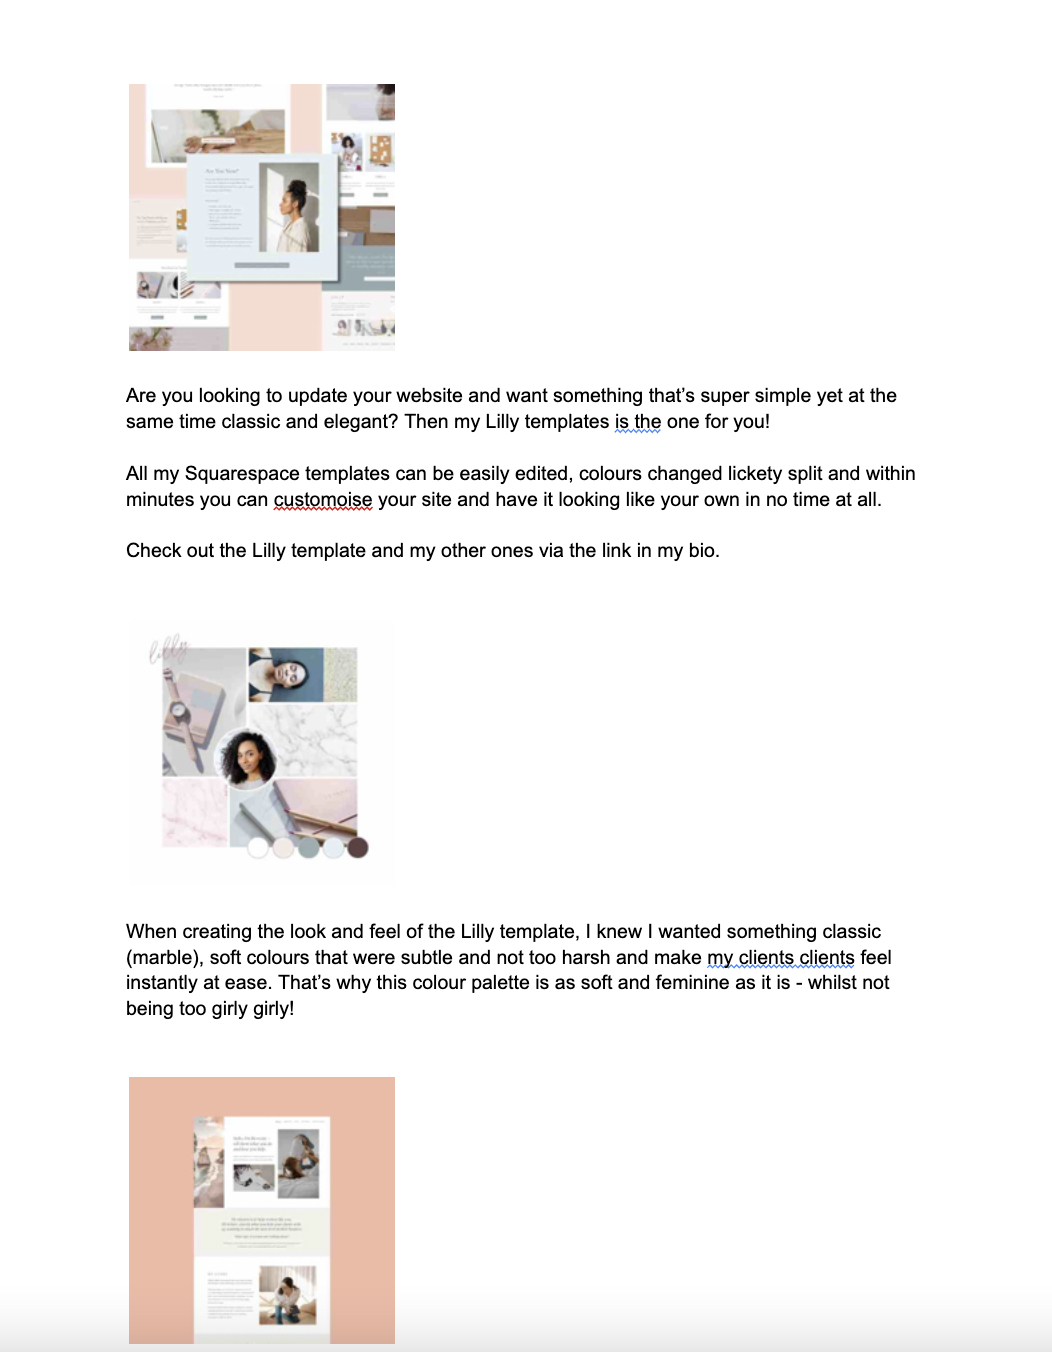
You want to create folders that will visually represent your 3-5 topics you’ve listed out above, that will work well with your business / industry. Obviously as a branding and Squarespace web designer, I have great visuals to use. But we can make your insta super visual too, if you’re a coach, pilates teacher, marketing manager etc
I have multiple folders;
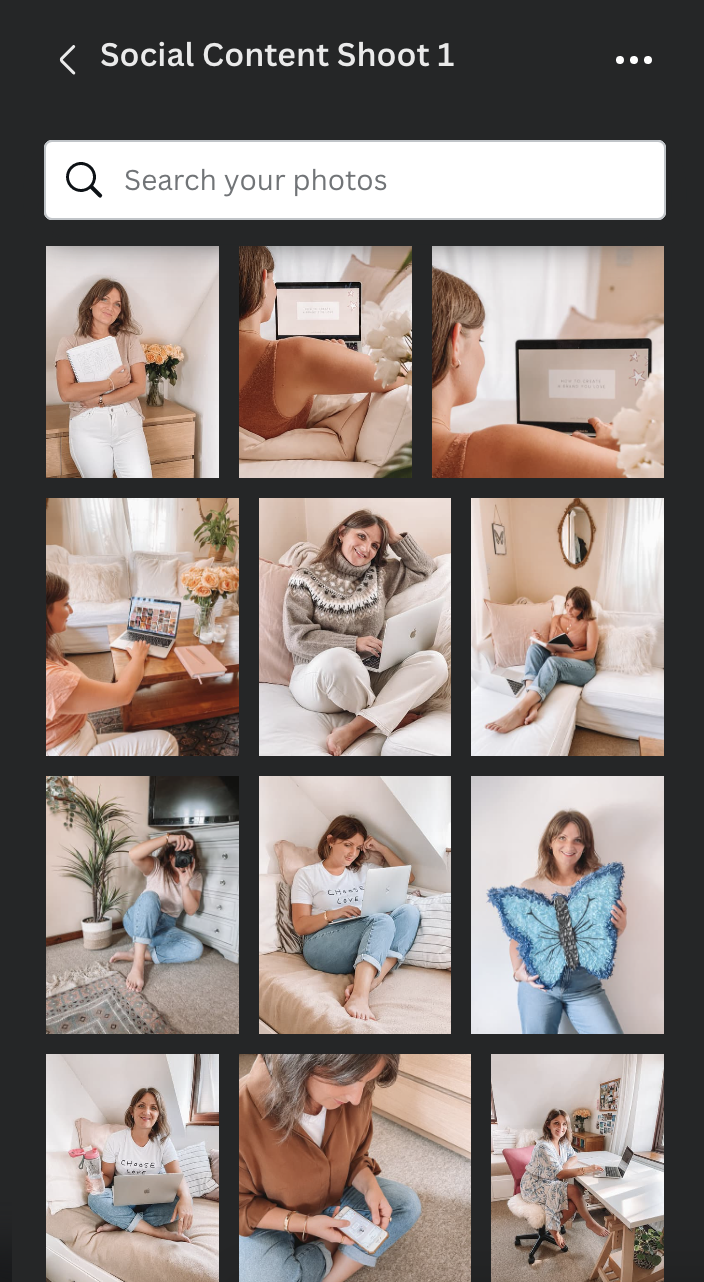
Photoshoots of me
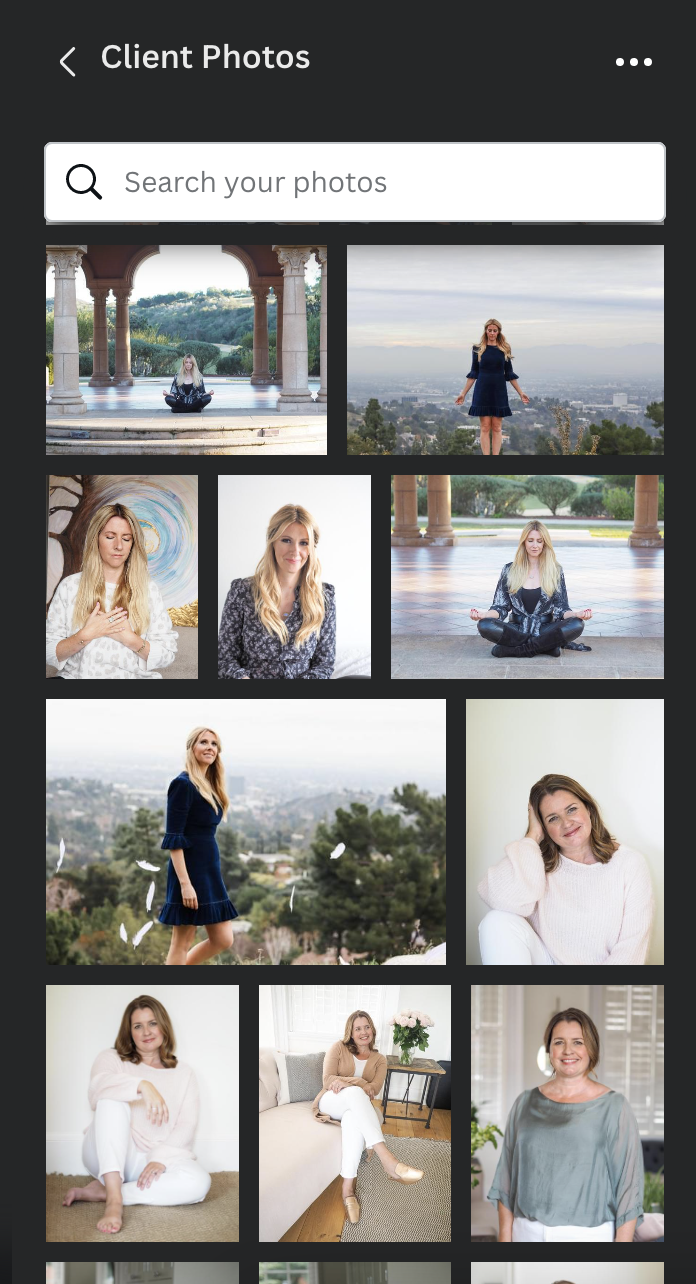
Client portrait photos (that I’ve taken)
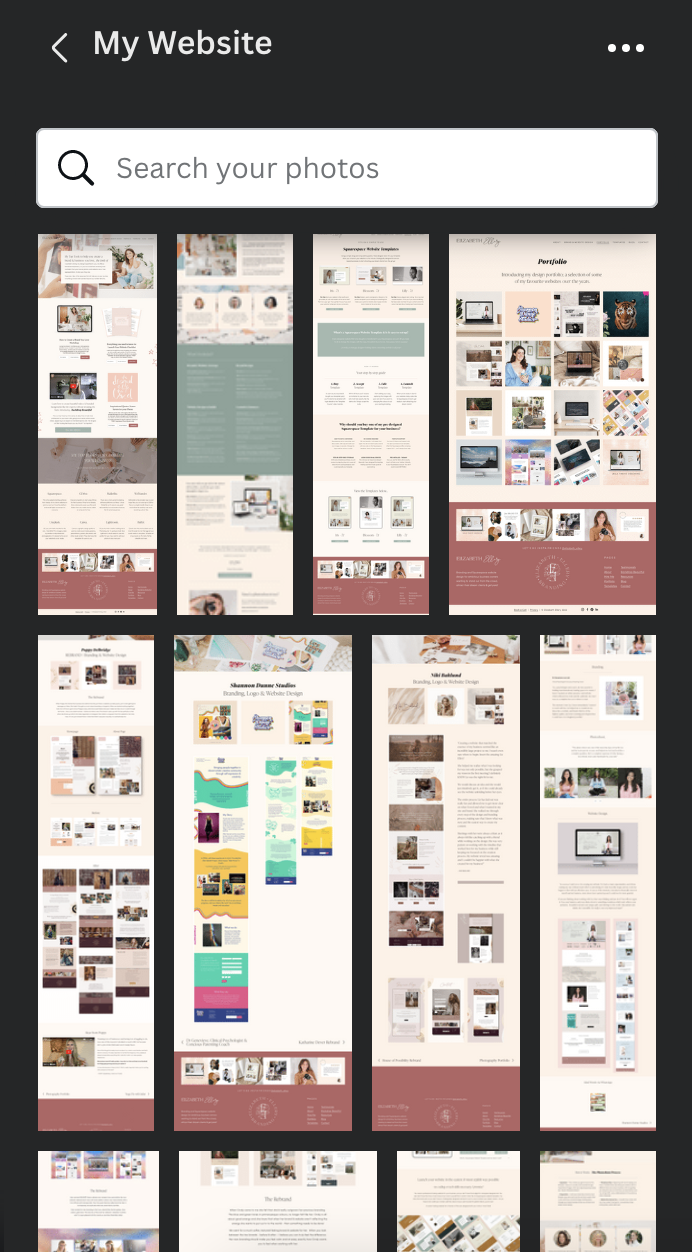
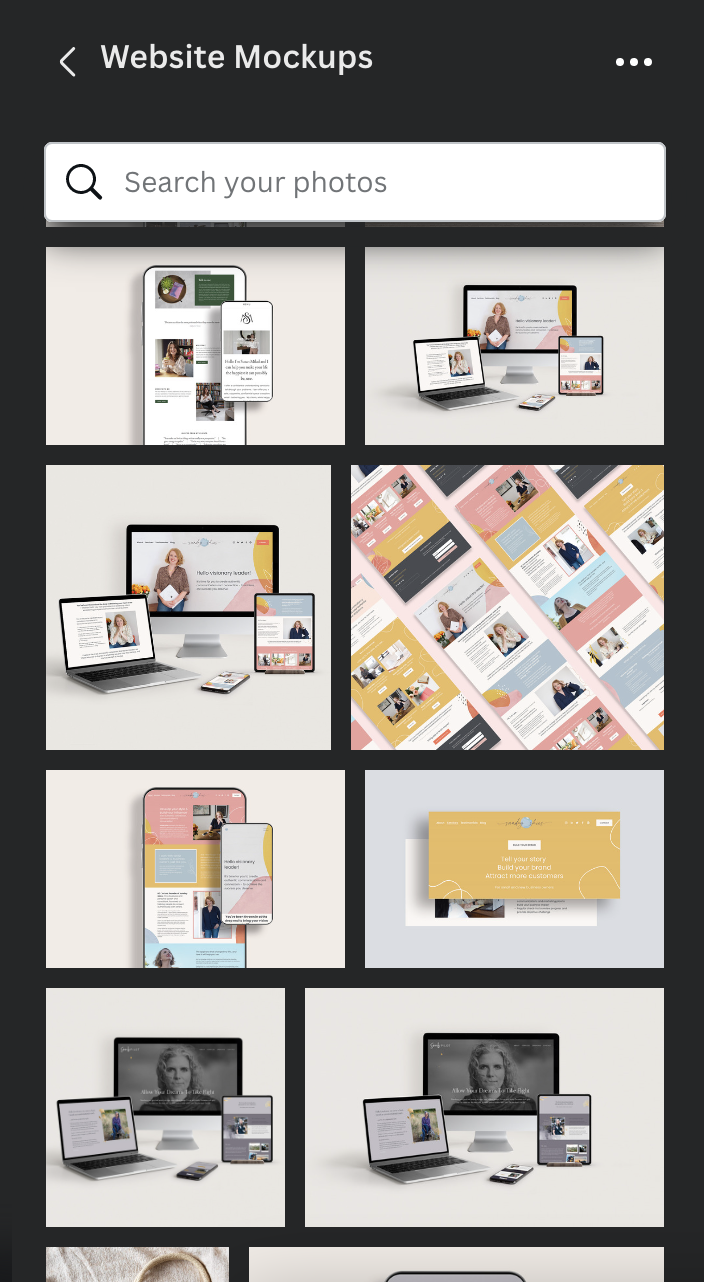
Website screenshots of past client work
Squarespace Template screenshots
Stock imagery of desk scenes & flatlays

This is how the Folders look in the Project area of Canva, when you click on the Folder tab as seen above

This is how the folders look when you click on the left hand side, Projects, then Folder tab in the Design document

Here are some examples of the folders I have for when I do my batching 👆
One of my clients has a virtual assistant who every month adds more images to each folder whenever she sees something she thinks will work well. So when she comes around to doing a monthly batch of Instagram posts, she already has lots of new imagery in the folder.
For instance this particular client loves all things celestial, bright, magical, spiritual imagery and has the following folders -
Moon folder
Magical imagery
Starry backgrounds
Client photoshoot folder
Client testimonial photo folder
You can also find images in the paid version of Canva by clicking ‘Photos’ in the left hand column when you’re in a design and searching for a particular image. I’ve used ‘hands at desk’ as the search term, as shown below 👇

Once you have your folders all created (whether that be in Canva or on your computer), we can go to the next step…
2. Create a design
When in the main bit of Canva, click on the ‘create a design’ button and select ‘Instagram post’
3. Create the blank batch squares
Now I want you to either above the blank white square click the + icon and duplicate the blank page or below it, click ‘+ Add page’ - do this for however many posts are in your mass batch. For this blog article example we’re doing 40, so let’s create 40 new blank squares.
4. Add the imagery & quotes
Now using your folders, which can be found on the left hand column > Projects > ‘Folders’ tab > Select the folder you want to add pics from
Now start adding some of the imagery you’ve collated that you think would go well with the grid we hand drew in the Plotting section.
For instance if I have a pic of me, I may write something about my morning routine or a story about myself or chat about something in my business that’s topical. If there’s a picture of some hands writing on a notepad, I may talk about my new online course.
If you want to add testimonials and quotes to your mass batch, I have a great tip for you if you’re not a designer or even if you are and you a base to start..
At the top, on the left column, click ‘Design’, in the search bar write - Testimonial or Quote.
Canva will then give you lots of different designs that you can click on and will magically appear in your grid. You can then customise them to your brand colours. Once you’re happy with the design you can duplicate that page and use it again somewhere later in your batch, perhaps alter it slightly.
I’m now hoping that you have lots of different types of imagery in your grid that would suit your business requirements over the next however many days you’ve chosen. So let’s get to the fun bit… laying it all out nicely.
3. Grid layout in Canva
To create a harmonious Instagram grid, I have a few tips up my sleeve. It mainly revolves around getting the photo / quote / graphic / reel / photo ratio right.
Sequencing
✅ DO…
Follow the below sequence strategy for your Insta grid…
Photo
↓
Reel with writing cover or testimonial or quote or biz tip
↓
Photo
↓
Reel with writing cover or testimonial or quote or biz tip
↓
Photo
Rinse & repeat this sequence indefinitely (see example below)

❎ DON’T
Don't have quotes next to each other or lots of the same scale photos together, if you do want to put photos or videos of you next together in the grid, make them different. Eg; a face close-up and next shot is of your workspace - so that they look different enough to be interesting.
My last Instagram layout Grid
This is an example of a 6 month Instagram image grid I did in Canva in May 2022.
As you can see, I’ve added copy on top of images when I know I want to add a video or reel that will be created neared the time. But this way, I know visually what will go there, how it will work in the grid and also I’ll be able to write copy for it in the google doc if needed. This is all a guide, so just do what works for you.
**MY ALL TIME FAVE TOP HACK**
To see how your content will look on instagram…
In the bottom right corner, click on the mini square icon ‘Grid view’
This will allow you to look at more posts at the same time
Now drag your screen window so that you can only see 3 posts width wise - this will show you exactly how it will look on the Instagram grid.
This is the fun part…
Now I want you to move the images around (you can click and drag them) so you get the sequencing grid layout as I listed above. This is a really great visual way to see this. See example image below 👇
Voila! The image side of this stage is done!

4. Writing Captions in Google Doc
This next stage is super simple and can be done in a few short steps..
1. Download images in Canva
For this next stage, you’ll want to go back to Canva first and download all the images you’ve created.
Share > Download > File type = jpg > Download
We want the images to be super small as we don’t need the quality to be good, just so we can see what the image looks like.
2a. On a Mac
Open the folder downloaded from Canva > Select all the images > Right click - Open in Preview > Select all the images > Tools > Adjust size > 150 x 150 pixels > OK
2b. On a PC
Go to bulkresizephotos.com > Upload all your pics > Scale images to 15% > Press Start and then download
3. Open a new Google doc & name it (eg. Insta Jan-Mar Captions)
4. Add all images
Insert > Image > Upload from computer > Select all from newly smaller resized folder
5. Write your copy
Once all of the images have been added add a couple of spaces between each one and start writing!
You may want to put certain dates next to each image so you know exactly what date you’d like it to be scheduled for - this is great if you have a VA adding the posts into a scheduling tool for you - which is what I do.
5. Scheduling Posts
There are lots of scheduling tool platforms out there so go and google your preferred one if you like, I use Buffer.
As I mentioned above I have a freelance VA I use to schedule my posts every 5 months or so to add all my images.
If you’re doing it yourself it’s super easy - I just hate this sort of thing haha so I delegate it.
You’ll need to add and link up your Instagram account within the platform - they go through the steps to do this.
Then start scheduling in your posts as and when you want them to go out. I think they can give you an option where it goes out on certain days every week - so entirely up to you.
And that’s it, you have officially batched your instagram content for the however many months you’ve chosen to do.
Hurrah and congratulations!!!
*Bonus - Stories
I wanted to add this last bonus section, to say, this is how I stay up to date with content - my stories.
For my business batching content is a no brainer, it frees up my brainspace to be working on client work and other marketing streams and insta posts don’t need to be of the moment for me.
Buuut I do like to be present on Instagram in a more fun way and I do this by adding Stories of more personal content so my audience get to know the real me behind the biz and also any relevant stuff that’s happening there and then. For instance yesterday as of writing this, I appeared on a podcast so I shared some stories about it and I actually added it to my grid as well, which I rarely ever do - so yeah feel free to mix things up if it feels good.
Taaaa-daaaaahhhhh!!!!!
Aaaand now you know exactly how I mass batch my Instagram content! I so hope that if you’ve ever felt that Insta is a suck on your time and you’d like to mass batch like me, then you know how to do so.
I usually block out 2-3 days in my calendar about 2 weeks before the end of the last scheduled post to create my next batch of content, so be sure to add that in. It’s funny, as I write this I’m coming up to the end of my last 6 month batch and am now even more excited to do my next mass-batch content creation stint.
I would say also to conclude, that I had a friend take photos of me around my house working or just doing things like meditating - any sort of photo that I thought I could talk about on my social - so that I’d have a good collection of photos for me to use for my next batching session. I actually had a professional shoot done mid last year that I’ll use for this next lot of content - cannot wait to share it :)
Here’s a final refresh of what you’ve learned today…
Strategy; Topics, Dates & Plotting. The main topics you’ll keep on chatting about, that will interest your audience, what launches or dates you’ll include in your content plan and how to actually plot / plan it all out.
Collating and creating your imagery in Canva. This is the exact process I use to input and create your own imagery for your own grid so that it looks awesome.
Grid layout in Canva. My top hack for making sure your images are laid out in the Insta 3 column grid style.
Writing Captions in a Google Doc. How and where to input your copy so you know what caption goes with each post, with an example of what I do. You can even read the sort of post I write for my imagery.
Scheduling Posts. And the final bit which is not my fave but kinda is - you get everything scheduled so you don’t have to think about Insta for the next 6 months - I mean besides connecting with your audience who respond to your posts.